Disclaimer: We support our readers with industry knowledge and expertise; explore. You support us through our carefully selected products with links that can earn us a commission.
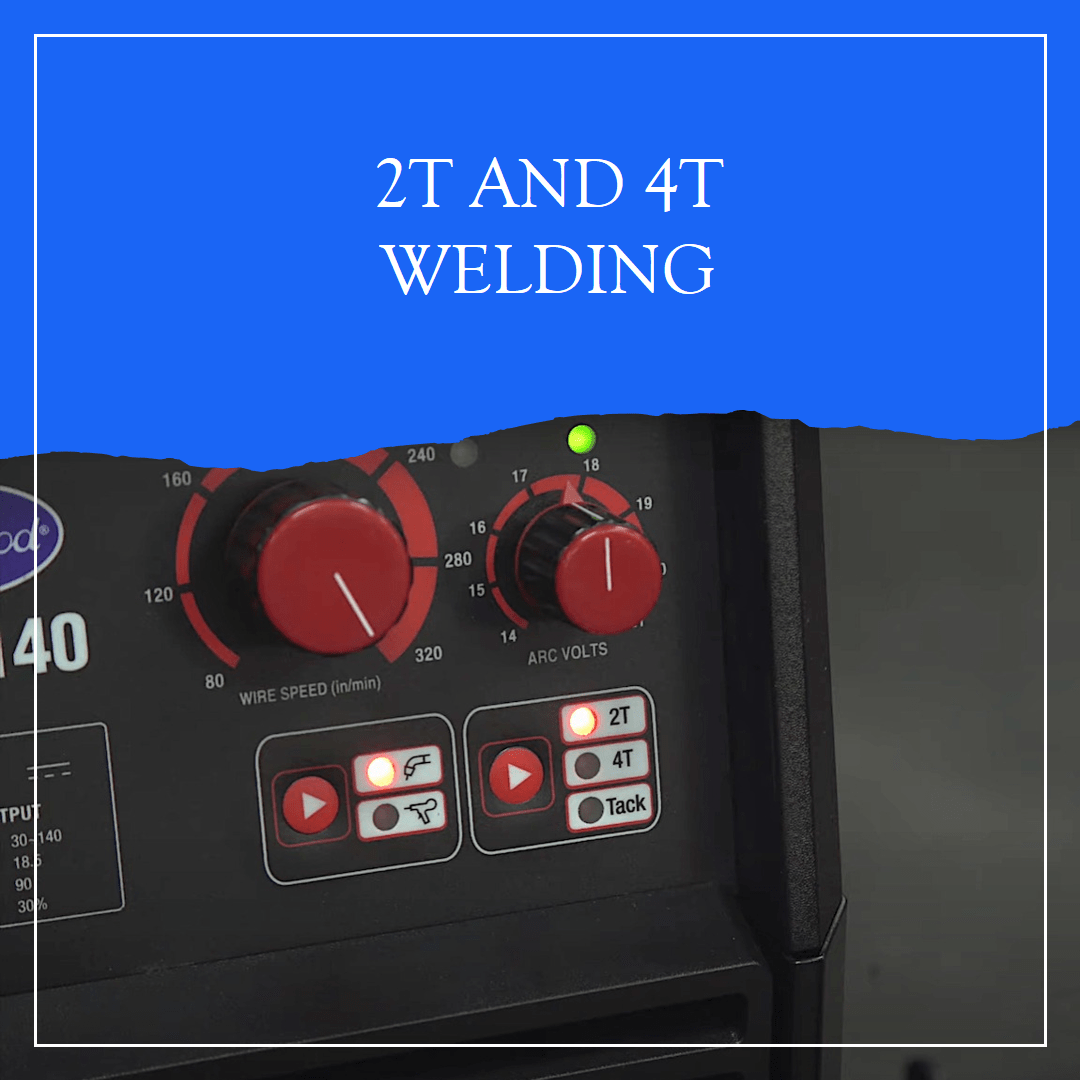
More and more TIG and MIG welders now have 2T and 4T as standard.
2T and 4T welding: what are they? What are the differences?
The main difference between the 2T and 4T is that the 2T is useful for short welds with quick start and stop, while the 4T is used for long welds where it is difficult to pull the trigger.
Although the 2T and 4T are identical on TIG and MIG welders, there is a slight difference in their operation.
2T and 4T – what are they?
These modes have a “t” symbol for “touch,” which refers to how many times you need to touch the torch button to start and stop welding.
2T stands for “2 touches.” This is a two-touch setting. The welder must press the torch button to turn it on and off, and then release it to stop. This setting is ideal for fast welding.
4T stands for “four touch.” This setting is done in four touches. To activate the welder, you simply need to release the trigger and press the button again. To stop the 4T activation, press and release the trigger. This is ideal for long welding jobs.
TIG welders have the option of using the foot pedal, 2T and 4T functions. For those who need detailed control, TIG welders still have foot pedals.
Standard equipment for MIG welders includes a torch button, so the 4T function is not an optional feature.
These customizations allow welders more flexibility for each project.
There are many models of welders that can offer 2T and 4T settings. However, they all work differently depending on whether they are TIG or MIG.
What are the best times to use the 2T and 4T modes?
The 2T and 4T modes, like other modes, offer welders many benefits. It all depends on what type of work you are doing.
Shorter welds can be achieved with 2T. You can use 2T for tacking, stitching or joining small areas. the 2T makes short welds quick and easy, making it easy to start and stop.
If you have to do longer welds or when you need a trigger that is hard to pull, the 4T is a better option. Welding long sections requires concentration and sometimes endurance. The 4T mode makes this easier by allowing you to concentrate on welding.
2T vs. 4T in TIG welding: how it works
As an alternative to the foot pedal, TIG welders have 2T and 4T functions. The foot pedal allows you to adjust the amperage, while the 2T or 4T function allows you to turn the flashlight on and off.
2T for TIG welding
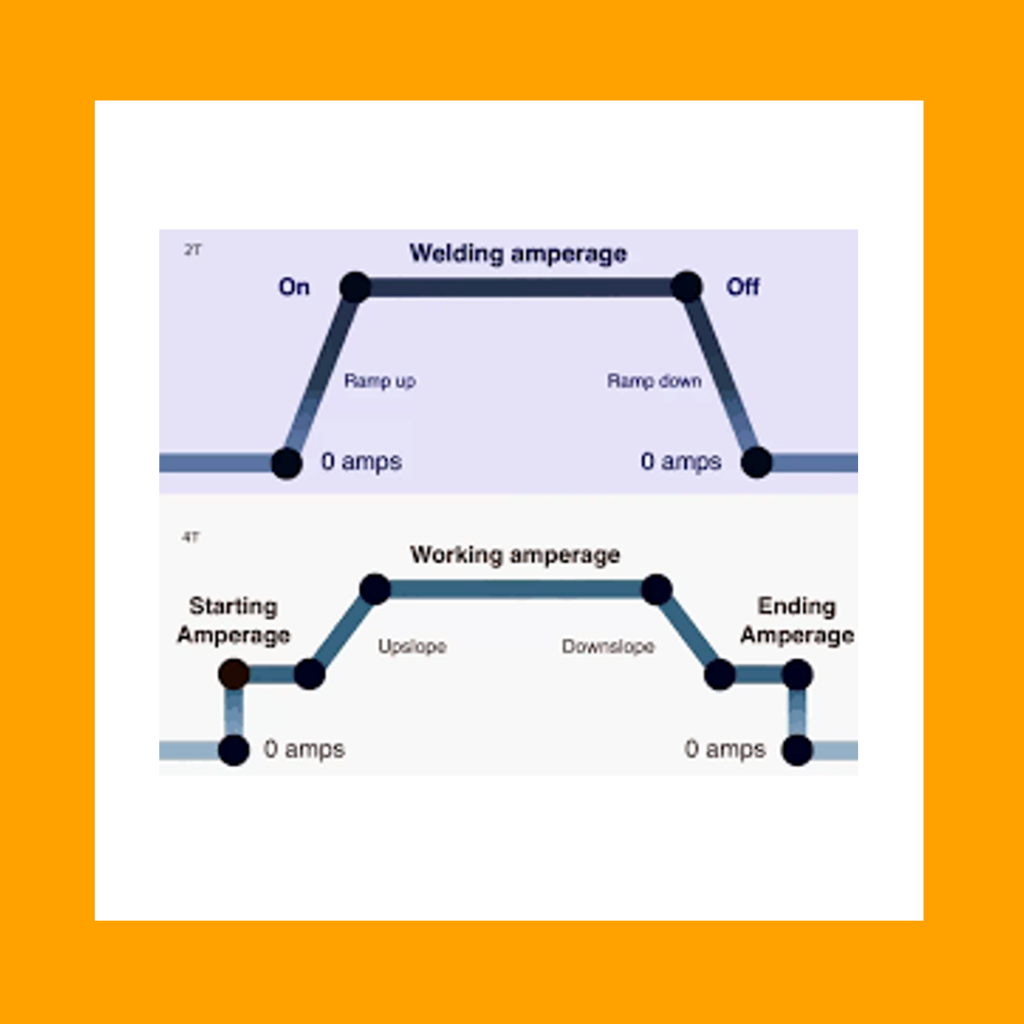
TIG welding with the 2T is simple. You can set the amperage to allow the machine to reach the specified amperage. You can adjust the acceleration or deceleration time of the machine so that it does not immediately reach the set welding force. This prevents blowing through thin metal.
To activate 2T, press and hold the TIG torch button. This will cause welding to begin. Release the trigger to stop.
4T for TIG welding
The 4T setting for TIG welding is a little more complicated because you have complete control over each step and the entire welding process.
Before starting, you must set the “starting amperage”. This is the maximum amperage at which your TIG welder must operate before it reaches full operating amperage. The advantage of the 4T is that you can use it as the starting amperage to heat the metal and then increase the operating amperage.
To activate the starting amp, press and hold the button on the flashlight. Release it to start increasing the operating amperage. You can now TIG weld without touching the trigger. You can then release the trigger to complete the arc by pressing the trigger again to reduce the steepness to the desired final amperage.
MIG welding: 2T vs. 4T – how it works
The 2T and 4-T functions in MIG welding are not intended to replace the TIG welder’s foot pedal. It is designed to enhance the functionality of your MIG welding torch.
The 2T and 4T functions on a MIG are easier than on a TIG welder because you don’t have to worry about amperage. Instead, you can set the wire speed and voltage. There are no slope down or slope up settings.
2T with MIG welding
MIG welding does not have a 2T function. It can be characterized as having no 2T function. Press the MIG torch trigger to start welding and then release it to stop welding.
4T in MIG welding
The MIG 4T function works the same as TIG welding, but without presets. To start MIG welding, press the button and then release it again. This allows longer MIG welding without having to hold the trigger.

